To view how to edit a title, click here.
To view how to delete/cancel a title, click here.
To view how to edit a Publishing Project, click here.
Adding a title
Adding a new title to your Bookvault account couldn’t be simpler! It will only take you a couple of minutes, and then you’ll be ready to place orders! To proceed with adding a new title, you don’t need files, these can be added at a later date.
Not only are we able to print and distribute your books, but we are also able to publish your books. You can check that out in another one of our tutorials. We will just be going through the printing in this tutorial.
STEP 1:
To get started, access the navigation menu on the left hand side in your Bookvault Portal and select ‘Add a title’. You will be presented with the option to do a print book or a bundle, for this guide we are only looking at the single print book. To look into setting a bundle up, please click here.
Please note – You need a Bookvault account to add titles.

STEP 2:
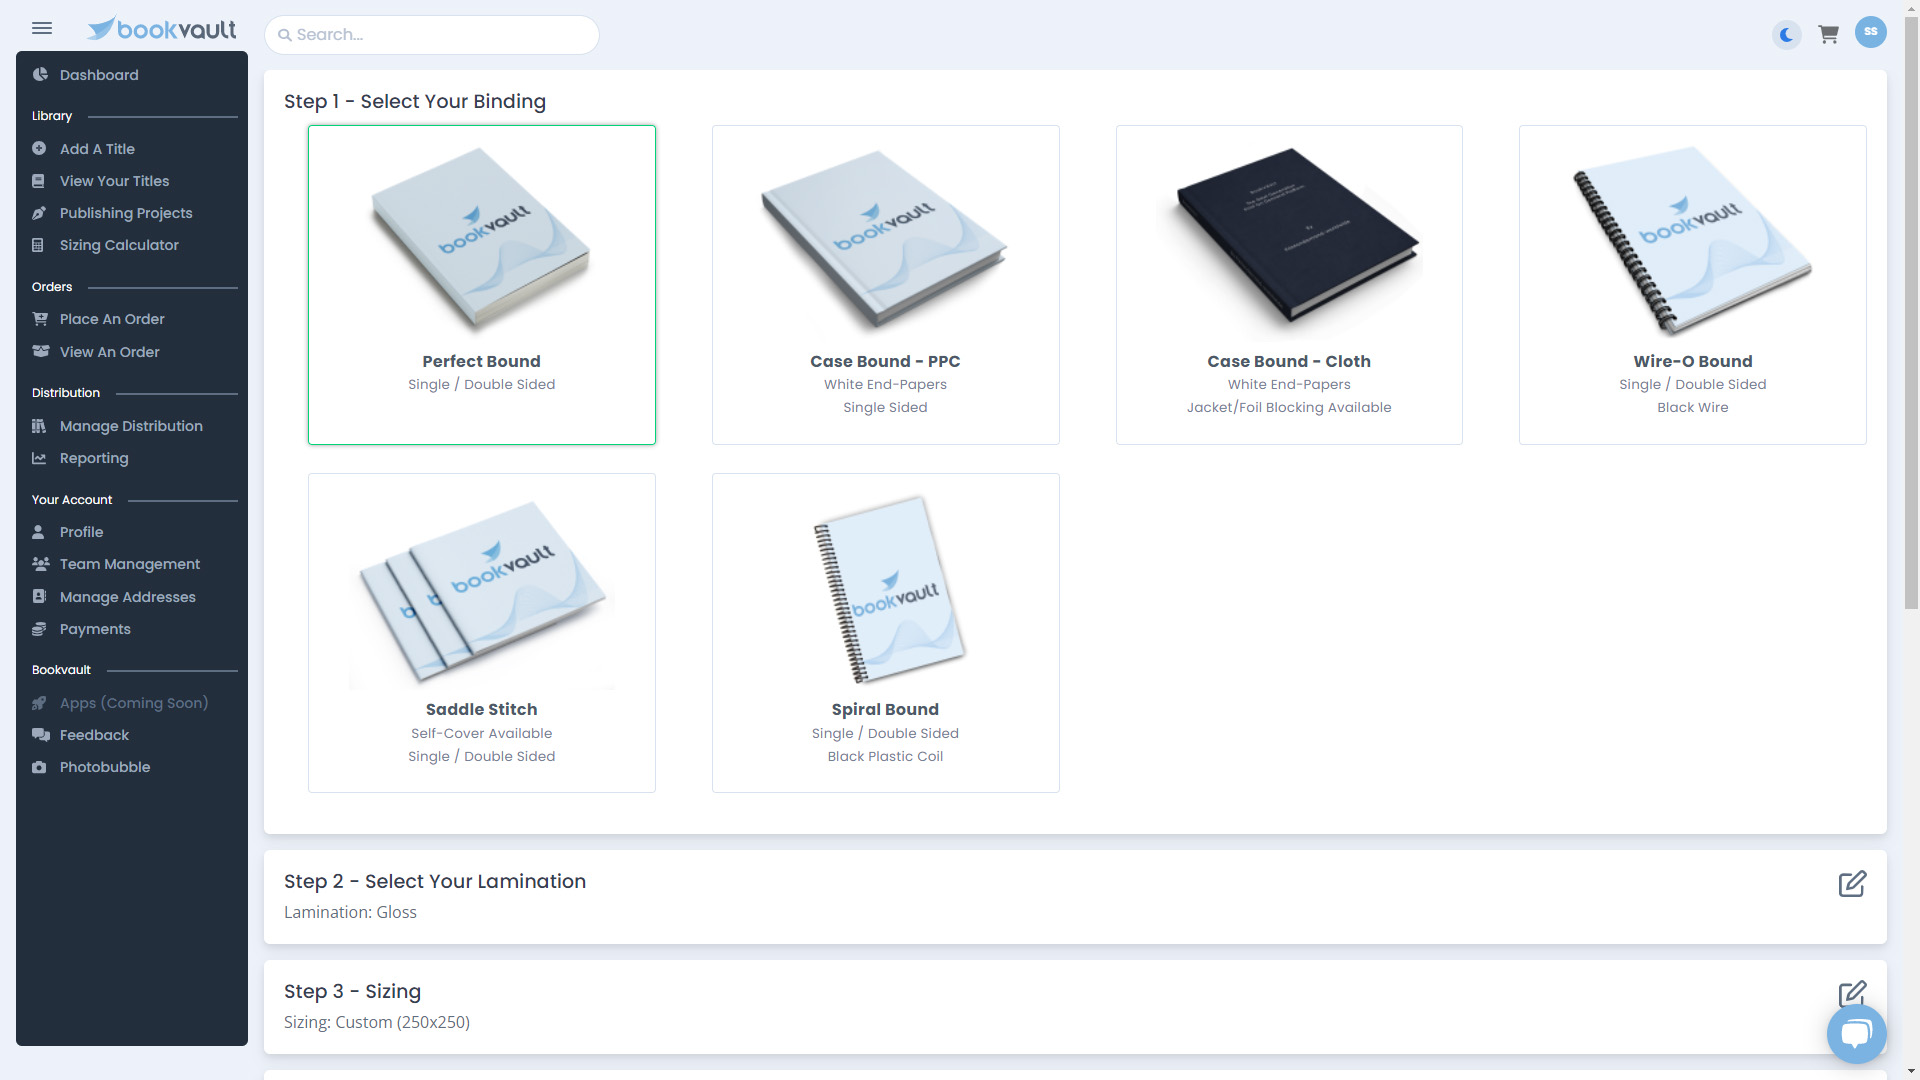
Once you have selected single print, all of our available binding options will be presented, hover over the images to get a closer inspection of the binding style. Once you have chosen the style you want for your title, click on it. You will see each of the options have a flag on the top left corner, this indicates where the specific binding is available to print.


STEP 3:
Once selecting the binding option, our available laminations will be presented, once you have made your decision, you can click on the button to add it to your title

STEP 4:
You will then have a selection of some of our standard sizes. These are what we often see our customers and the industry using for their books. What if yours doesn’t match these, not a problem, we have a custom size option available. Once selecting this, you can input your height and width of your books.

STEP 5:
The next section is for selection of the paper stock your book would be printed on, this would update if there are any changes to our stock. If you want to know what our different stocks are like, you can request a free sample pack here!

STEP 6:
Once you have selected a stock for the interior pages, it will then provide you with an option for the cover stock, with some of the binding options there will be multiple options for self covers or coloured cloth covers (More information on self covers/coloured cloth covers below)

STEP 7:
We now need to specify our page count, if you have any colour in the document and want that as colour – you would need to specify that as a colour page. The page count does not include your cover. The sum of the colour and mono pages should equal the number of pages in your PDF document.

STEP 8:
So once filling all the above specs, you get to the last stage – at this point you can see what the single production cost of your book would be. In this section you would indicate your ISBN number if you have purchased that which will allow us to sell and distribute this book, we have another video about that here. If you have not purchased an ISBN number, you can click on the ‘Generate a Dummy ISBN’ for one to be added, this will not be added to the book and is for our reference on the system.
You’ll also need to add the title of your book, this helps you identify it throughout the Bookvault system
You may have the toggle for a premium title, switch that on to change the production workflow. Find more about our standard / premium books here.
Check through all the specs are correct, you can always change these later! Once happy, click on the ‘Add to my library’ button to make payment and get this title onto your account. The payment is a one off fee to unlock the best pricing possible for your book. It covers the cost of setting up your title on the Bookvault platform, and the processing of your files.

STEP 9:
Once you’ve made payment, you should have this box pop up, asking you to upload the files, don’t worry – you can always do those at a later stage. If you’re ready, checkout our guide on how to upload files here.

Additional Options:
As you go through your quotation, depending on your binding selection you will see some different customization options available to you, these will be detailed below.
Case bound cloth:

When selecting ‘Case Bound – Cloth’ your lamination, size and text stock options will be the same as a Perfect Bound, once these are selected you will be presented with an option to choose your cover stock (Colour and design).

Once you have selected your cover stock, then input your colour/mono page numbers. After you will have the option for your colour of foil blocking, it’s location on the front and spine, as well as what you want the text to say. You will also have the option to select a dust jacket.
Please remember to input your Foil Text or this will be blank.

Wire-O Bound and Spiral Bound


When selecting Wire-O Bound or Spiral Bound the main difference you will see is there’s an option to ‘Select Your Cover Stock’. What this means is ‘Self-cover’ would be a cover using the same paper as the interior, for example, if you chose 80gsm paper for your interior, the cover would be printed on the same paper. Choosing ‘Cover Board’ would use the standard cover stock which is 250gsm.

You will notice at the end of adding the title, the ‘Title Pricing’ box will display whether or not it can be printed and distributed in the UK/US.

Saddle Stitch (Also known as stapled book/Staple bound book)
Like the Wire-O and Spiral bound books, the saddle stitch also provides you the option to have a ‘Self-Cover’ or ‘Cover Board’

Please note – with certain combinations of specifications, this will cause a page limit. Select different specifications to allow for more pages.

Editing a title
Whether you’ve added your title onto bookvault incorrectly, or changing the specification of your book – that is all possible through your dashboard.
STEP 1:
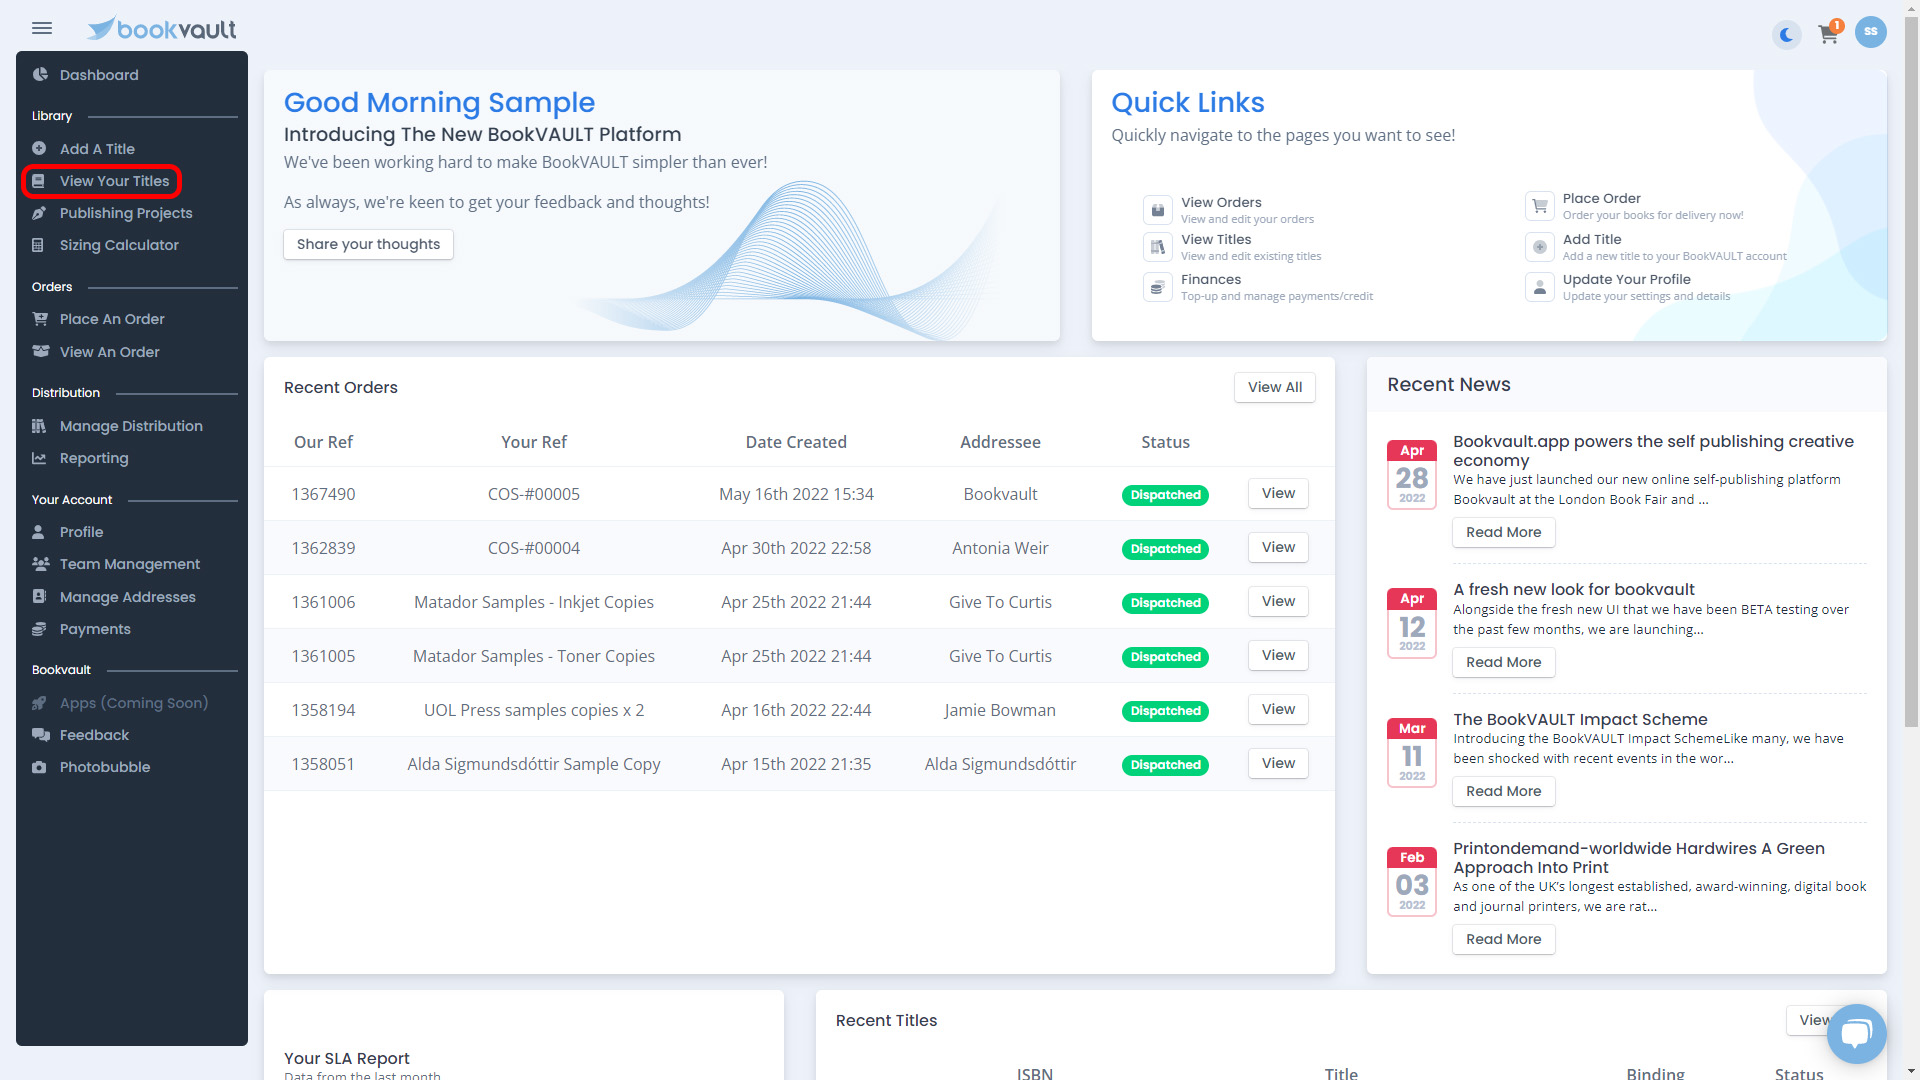
Use the navigation menu on the left hand side and select ‘View Your Titles’
STEP 2:
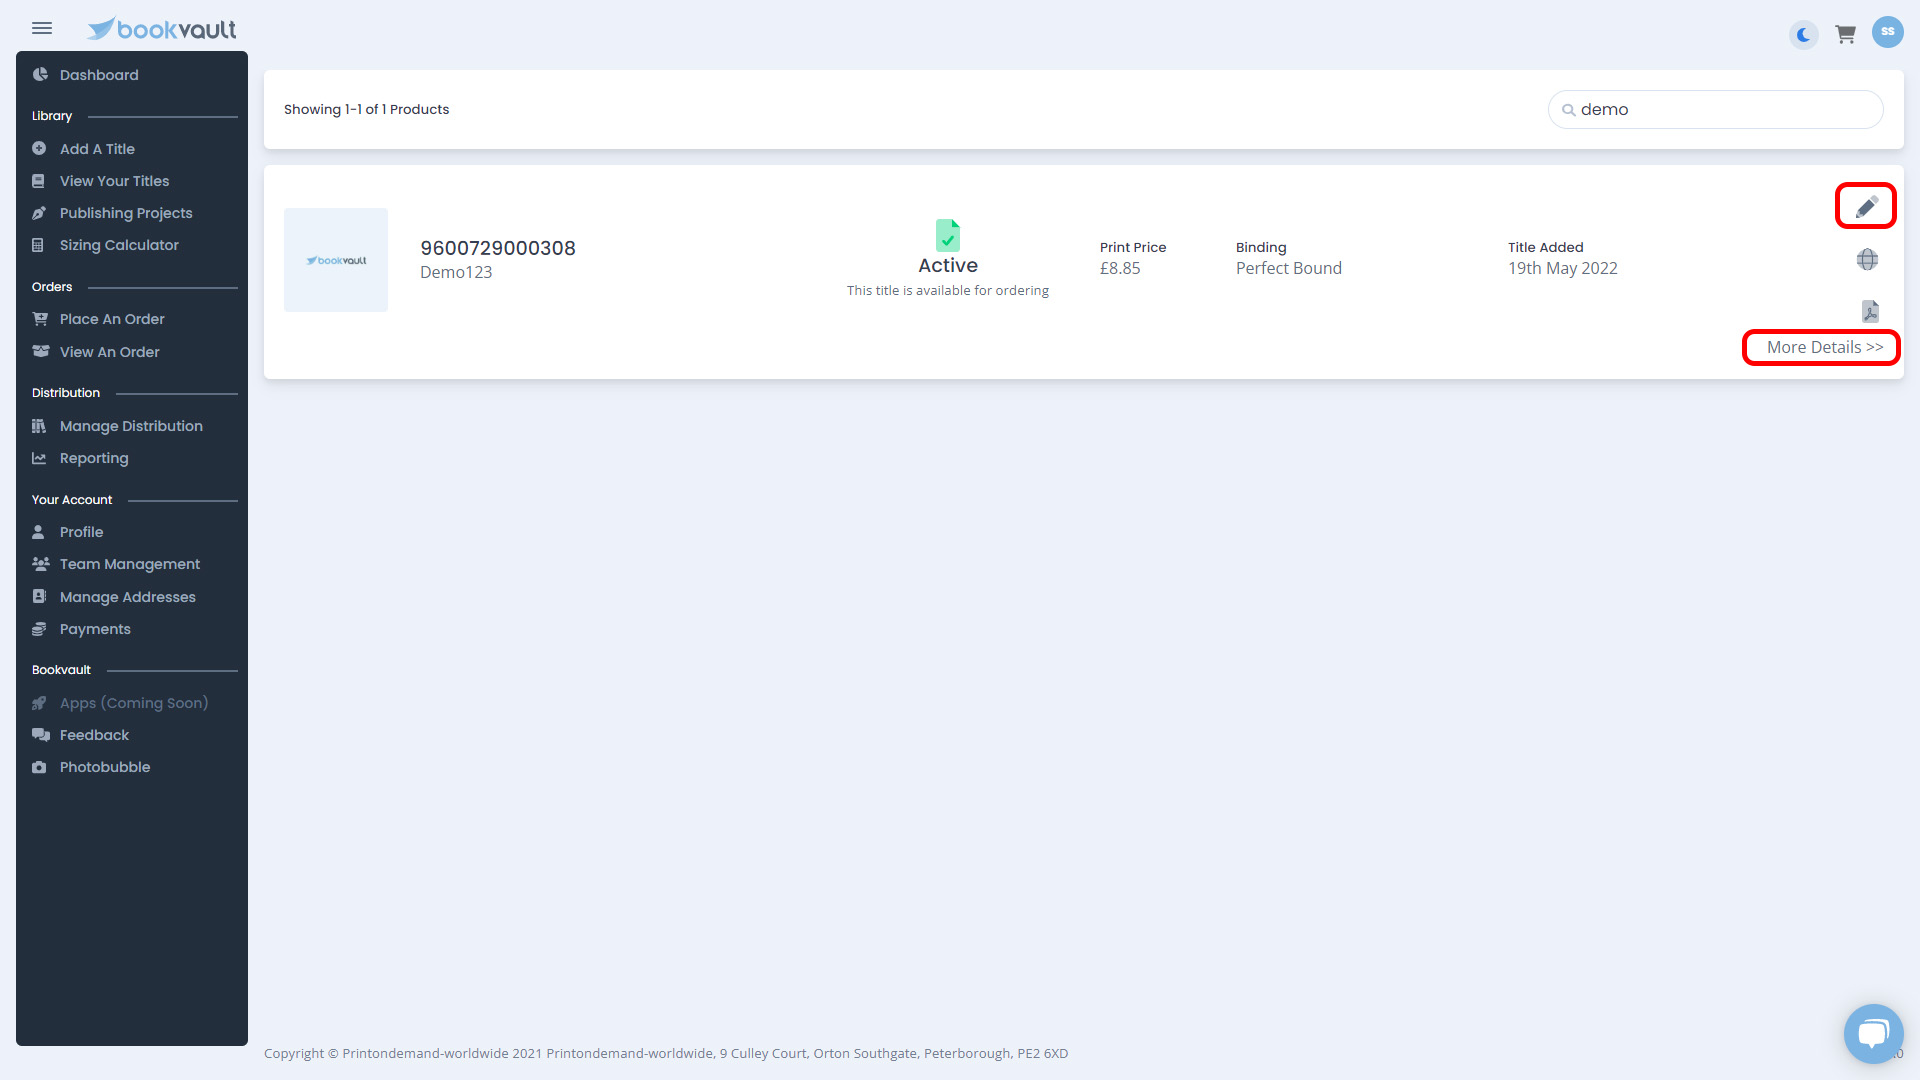
Once you have landed on the ‘View Your Titles’ page, find the title you want to edit. You can use the search function to find your title by either putting in the name or the ISBN. You can then hit enter on your keyboard to view the titles that are matching your search criteria.

STEP 3:
Once you have all your search results back, or can see the title you want to edit from the library, you can push the pencil icon button at the top, or click ‘More Details >>’ and then select ‘Edit Title’ from the submenu of buttons.

STEP 4:
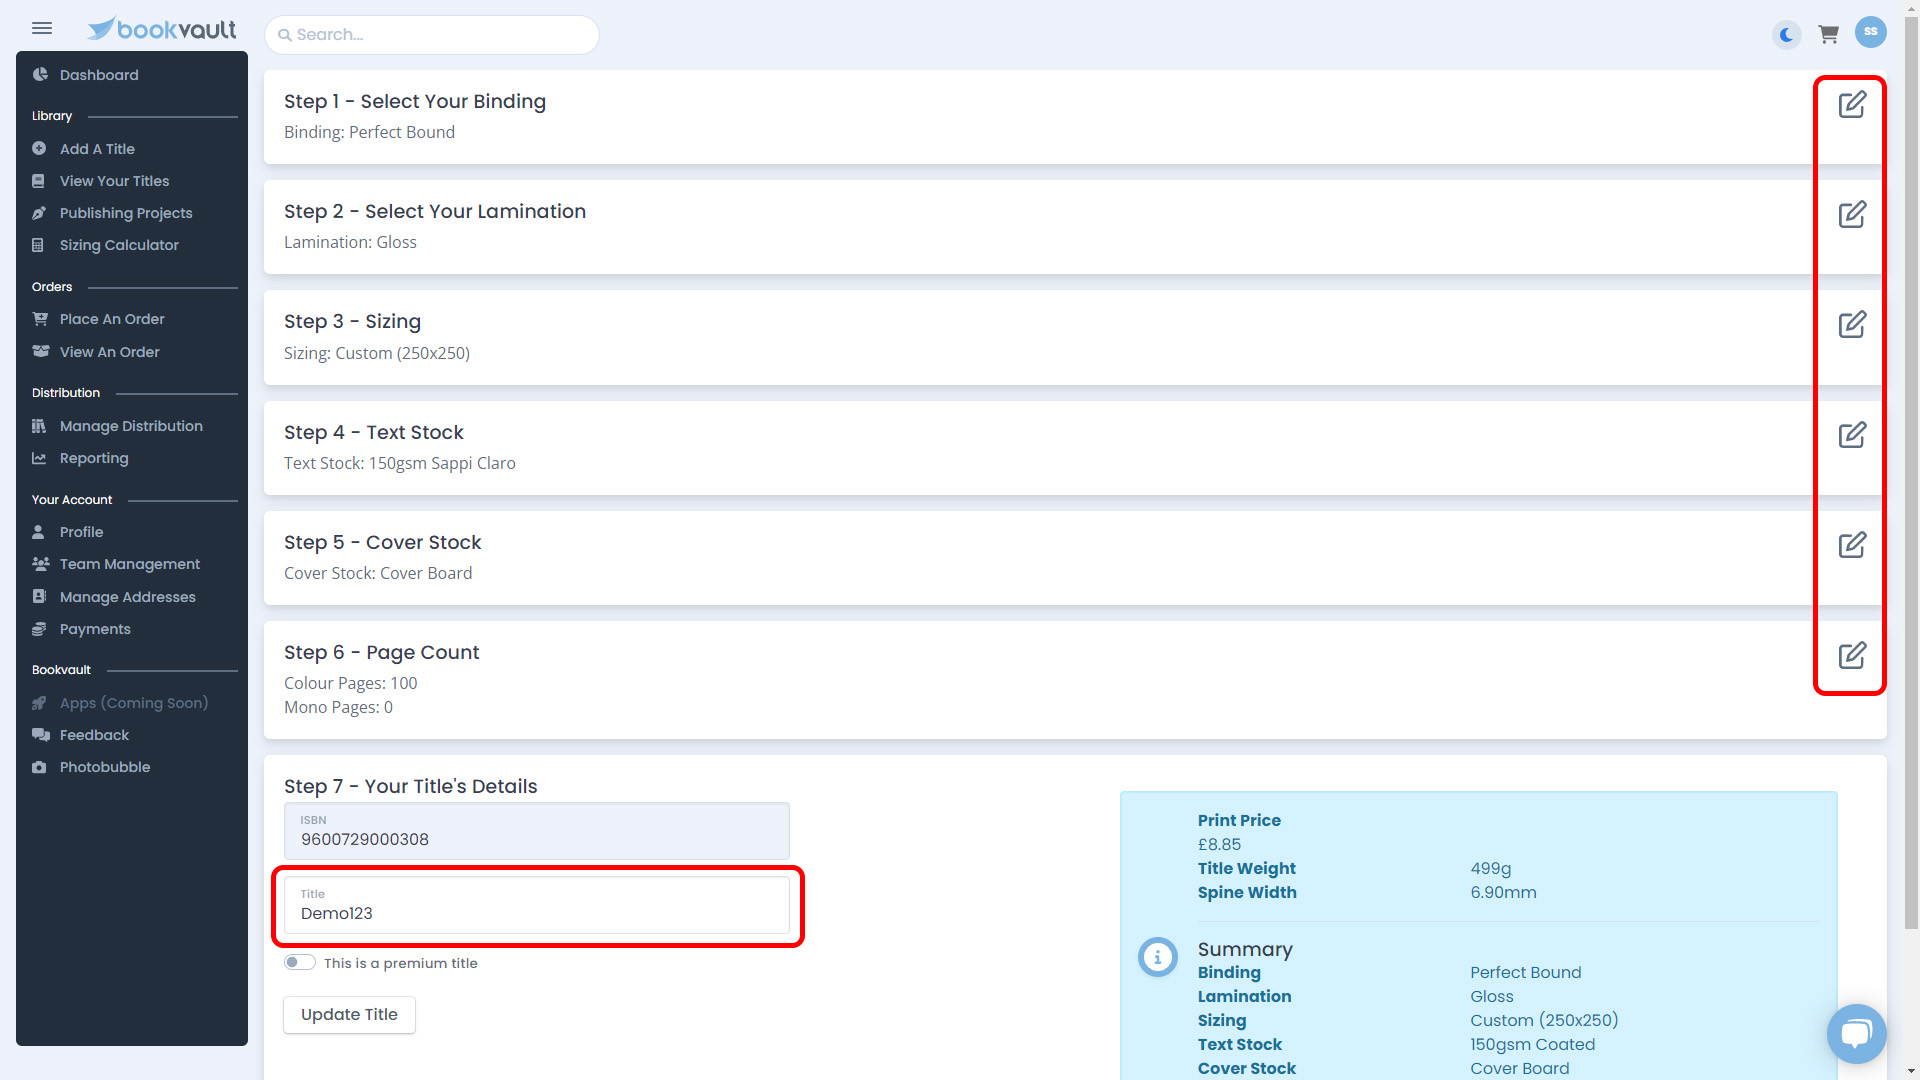
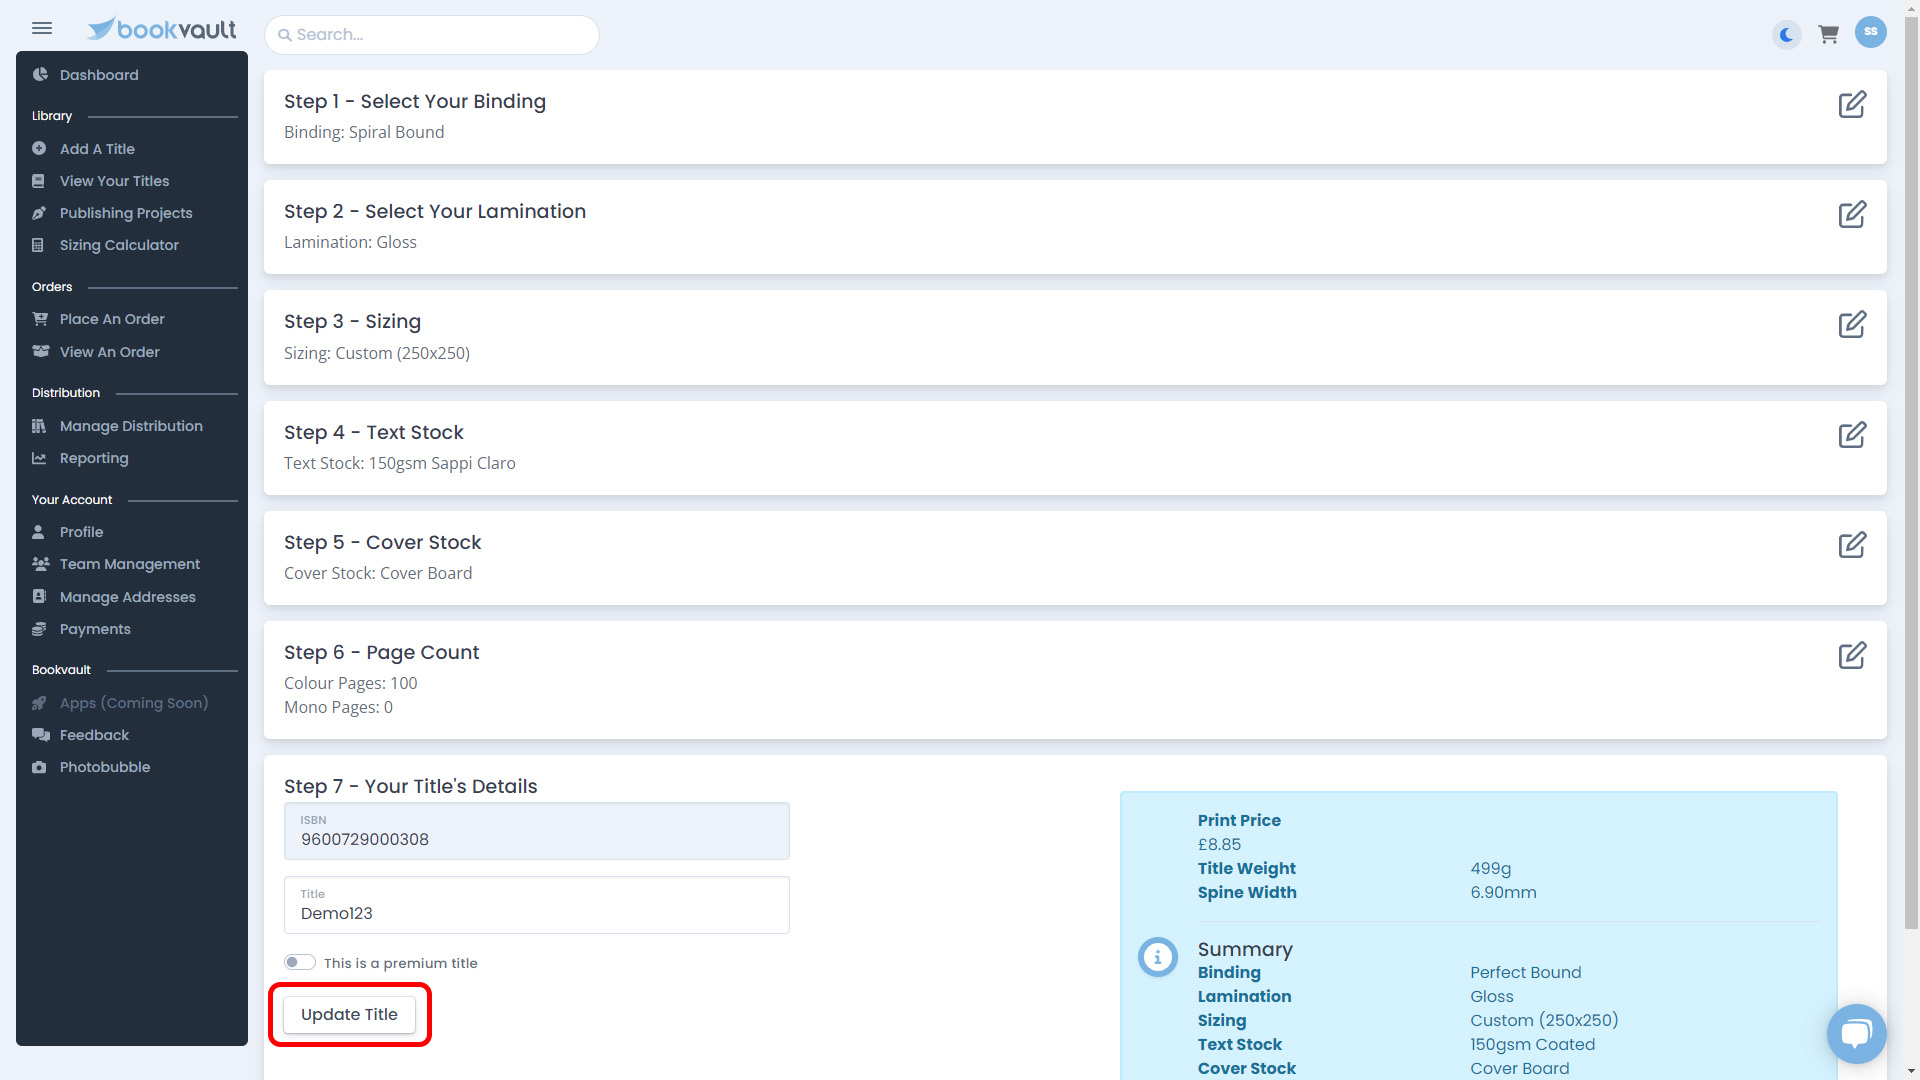
You will then go into the familiar look of the title editor. You can edit everything about a title, apart from the ISBN number. To edit a section, you can click the icon on the right hand side to expand it and make a new selection. You can also adjust the name of your title on bookvault.
STEP 5:
Expand the field, you want to change, and make the adjustment to the selection. Once you have done this, it will show you the summary of all the book, if there is something else you would want to change about the title you can repeat the same process.
STEP 5:
Once you are happy with all the changes made to the book, you can press ‘Update Title’ at the bottom of the page.
STEP 6:
Once you press update, if you've made a change that alters the page count, binding or size of the book, the files will go into validation automatically.

Once your files are validated, you're all good to go!
I want to edit my title (Publishing Project)
So you've decided to publish with Bookvault, but you want to edit something about your book. No problem at all.
To start with head to your 'Publishing Projects' on your Bookvault portal, you will see a list of your project(s), find the one your looking to edit and click 'Edit Specification'.

Once you've selected edit specification, you will be taken to the same page as when you add a title.

Scroll through and make your preferred changes, then when ready, hit 'Update Title' at the bottom of the page:

You will the have a pop up which will display the below:

And that's all done, your title has now been amended.
I want to cancel/delete my title
Added a title to bookvault by mistake, or you want to discontinue the book. You can cancel a title on bookvault so orders can’t be placed for it and it will be pulled from sale from all available retailers the book was showing for sale on.
STEP 1:
Access your titles by clicking on ‘View your titles’ on the navigation pane on the left hand side of the portal
STEP 2:
Once you have landed on the ‘View Your Titles’ page, find the title you want to cancel. You can use the search function to find your title by either putting in the name or the ISBN. You can then hit enter on your keyboard to view the titles that are matching your search criteria.
STEP 3:
Once you have all your search results back, or can see the title you want to cancel from the library, click ‘More Details >>’ to open up the title manager.

STEP 4:
You will have a sub menu of buttons to select from, select ‘Cancel Title’.

STEP 5:
Once you click this button, it will cancel the title and bring you back to view your titles and can see that this is clearly marked as a ‘Cancelled’ title.
Once this is done, this will then schedule pulling the book from all the retail sites we made the book available to, please note, there are some third parties who will sell this book so may still show on their listing.
Once the titles is cancelled, you will no longer be able to place an order for this book. If you want to activate this title again, you can go through and upload new files and that will set it back on the validation process.

If you want to remove a title completely from your library, you can follow the below steps;
STEP 1:
Access your titles by clicking on ‘View your titles’ on the navigation pane on the left hand side of the portal
STEP 2:
Once you have landed on the ‘View Your Titles’ page, find the title you want to delete. You can use the search function to find your title by either putting in the name or the ISBN. You can then hit enter on your keyboard to view the titles that are matching your search criteria.
STEP 3:
Once you have all your search results back, or can see the title you want to delete from the library, click ‘More Details >>’ to open up the title manager.
STEP 4:
You will have a sub menu of buttons to select from, select ‘Delete Title’.

STEP 5:
Once you press this, you will get a pop up box to make sure you want to delete the title. It informs also that the title can then not be recovered, and that this ISBN can not be used in future. If you are sure you want to delete the title permanently from your account, click ‘Confirm’.

STEP 6:
Once you click ‘Confirm’, it will take you back to view your titles and give a success message that the title was deleted. This title will no longer be visible on your account.
