![Layer 2.png]](https://help.bookvault.app/hs-fs/hubfs/Layer%202.png?height=31&name=Layer%202.png)
Step 1: Open Your Author Profile Settings
In your BookVault dashboard, look under the Bookvault section of the left-hand sidebar and click BookVault Shop. This opens the BookVault Shop management page, where the Author Profile Settings card lets you build the page readers see about you.


Step 2: Upload a Profile Photo
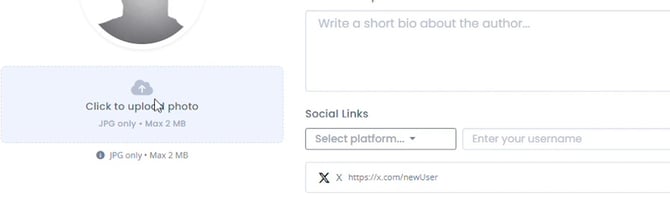
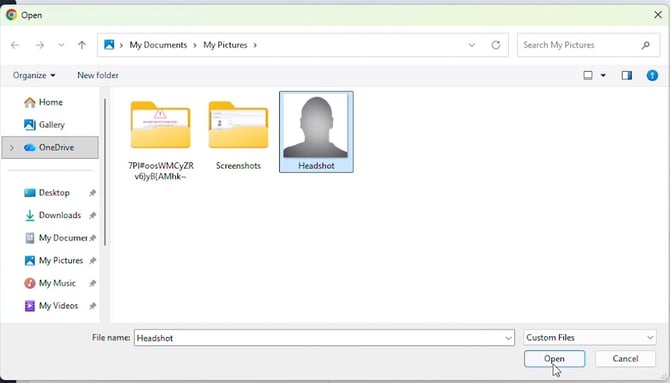
In the Author Profile Settings card, click the Click to upload photo box under the profile picture placeholder. In the file picker that opens, choose a JPG under 2MB from your computer and click Open to upload it.
Step 3: Add Your Author Name and Bio
Type your name into the Author Name field, then write a short introduction in the Short Description box below it — this is the text that appears alongside your photo on your author page.

Step 4: Add Your Social Links
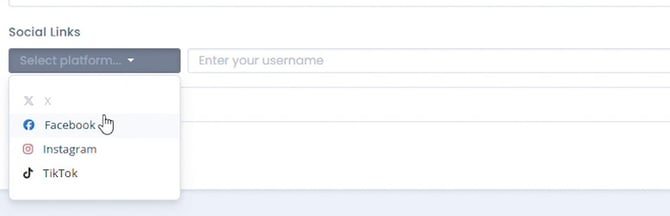
Under Social Links, click Select platform to choose a network such as Facebook, Instagram, or TikTok, enter your username in the field beside it, then click Add. Repeat for each profile you want to link — added links appear in a list below, each with its own delete icon.
Step 5: Get a Shareable Link to Your Author Page
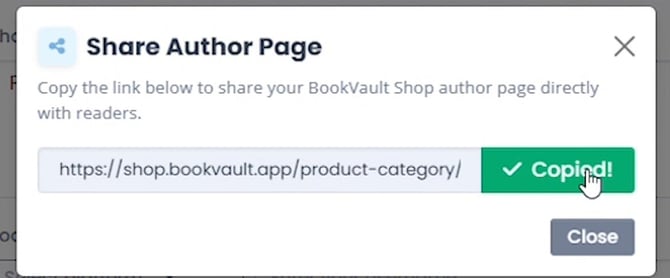
Click the share icon in the top-right corner of the Author Profile Settings card to open the Share Author Page window. Click the button beside the link to copy it — it changes to Copied! to confirm — then click Close.

Step 6: Save Your Author Profile
Once everything looks right, click Save Author Profile in the bottom-right corner. BookVault briefly shows a Saving... state while your author page updates.

Frequently Asked Questions
What image format and size does BookVault accept for an author photo?
The upload box accepts JPG files up to 2MB. Use a clear, front-facing photo — it displays as a circular headshot on your author page.
Can I edit my Author Profile after saving it?
Yes. Reopen Author Profile Settings from BookVault Shop at any time, update your photo, name, bio, or social links, and click Save Author Profile again to publish the changes.
Which social platforms can I link from my author page?
The Select platform dropdown includes Facebook, Instagram, and TikTok, and X (formerly Twitter) can also be linked as a social link.
Can I add more than one social link?
Yes. Choose a platform, enter your username, and click Add for each profile you want to include. Every link you add appears in a list below the form, each with its own delete icon if you need to remove one later.
Where do readers see my Author Profile once I save it?
Your photo, bio, and social links appear on your public author page on your BookVault Shop, alongside the titles you've listed there.
How do I share my author page with readers?
Click the share icon on the Author Profile Settings card, then click the copy button in the Share Author Page window. Paste the copied link into your newsletter, social media bio, or website.
Do I need to fill in every field before saving?
The form doesn't flag any field as required, but adding a photo, name, and short bio at minimum gives readers a much fuller picture of you than leaving fields blank.