![Layer 2.png]](https://help.bookvault.app/hs-fs/hubfs/Layer%202.png?height=31&name=Layer%202.png)
Step 1: Start Your Instant Quote
Head to Bookvault and click "Get Your Quote Now!" on the homepage. This launches the step-by-step title builder, which walks you through every printing option and updates your live preview and quote as you go.

Step 2: Choose How You Want to Start
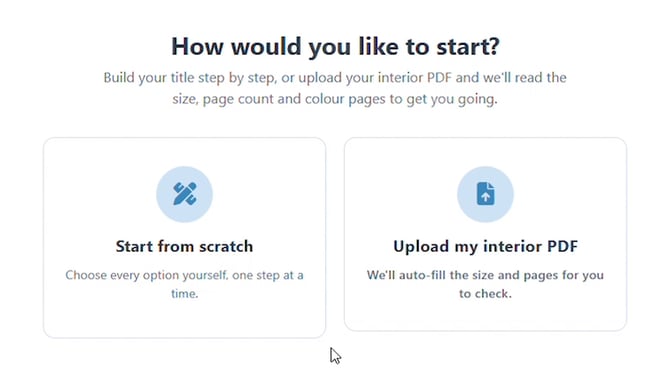
Next, decide how you'd like to begin. Choose "Start from scratch" to select every option yourself one step at a time, or "Upload my interior PDF" and Bookvault will automatically read your file to fill in the size, page count, and colour pages for you to check. This guide follows the "Start from scratch" path.
Step 3: Select Your Binding Type
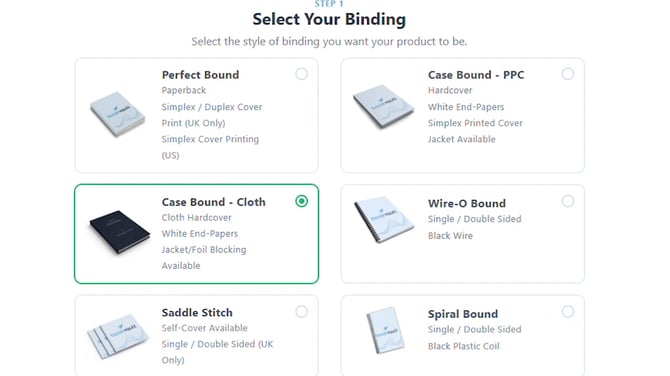
Choose the binding style for your book: Perfect Bound (paperback), Case Bound in PPC or Cloth (hardcover), Saddle Stitch, Spiral Bound, or Wire-O Bound. Each card lists its cover style and print availability. This example selects Case Bound - Cloth — a cloth hardcover with white end-papers and jacket or foil blocking available. Notice the step bar on the left loses its Lamination step for this binding: cloth doesn't use a gloss or matte laminate the way printed covers do.
Step 4: Choose the Size of Your Title
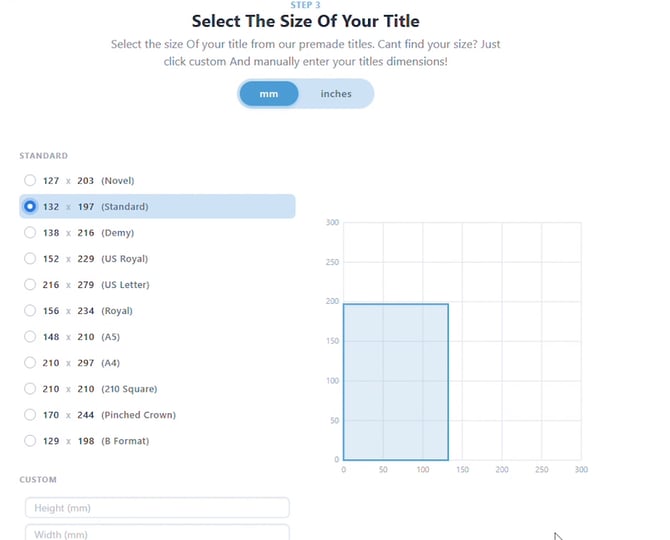
Select a standard trim size in millimetres or inches — Novel, Standard, Demy, US Royal, A5, A4, and more — or enter custom height and width dimensions if your title doesn't match a preset. The live graph on the right shows your selected dimensions to scale as you choose.
Step 5: Select Your Text (Interior) Stock
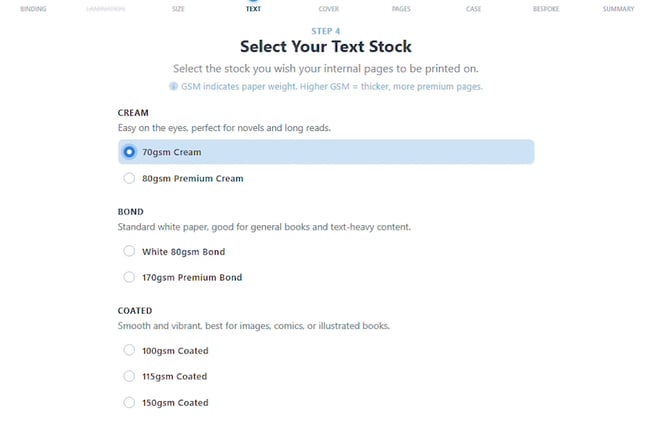
Choose the paper your interior pages will print on: Cream (easy on the eyes, ideal for novels and long reads), Bond (standard white paper for general and text-heavy books), or Coated (smooth and vibrant, best for images, comics, or illustrated books). Each option lists its GSM weight — higher GSM means thicker, more premium pages. This example selects 70gsm Cream.
Step 6: Select Your Cover Stock
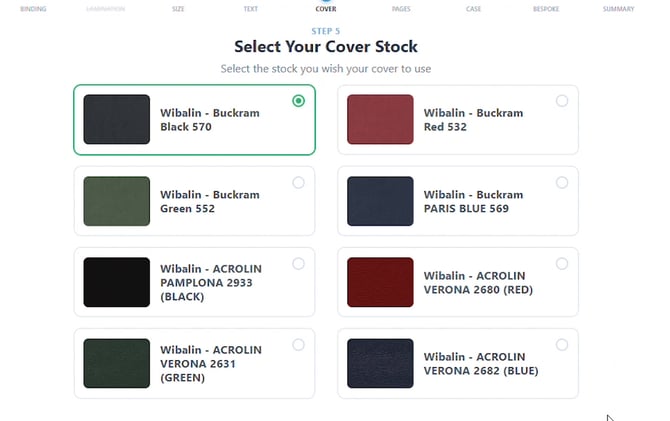
Case Bound - Cloth is the one binding where Bookvault gives you a genuine colour choice for the cover itself — Wibalin Buckram in black, red, green, or navy, or Wibalin ACROLIN finishes in black, red, green, or blue. "Simply choose a style and colour that best suits your book and continue," as the tool puts it. This example picks Wibalin - Buckram Black 570.
Step 7: Set Your Page Count and Print Colour
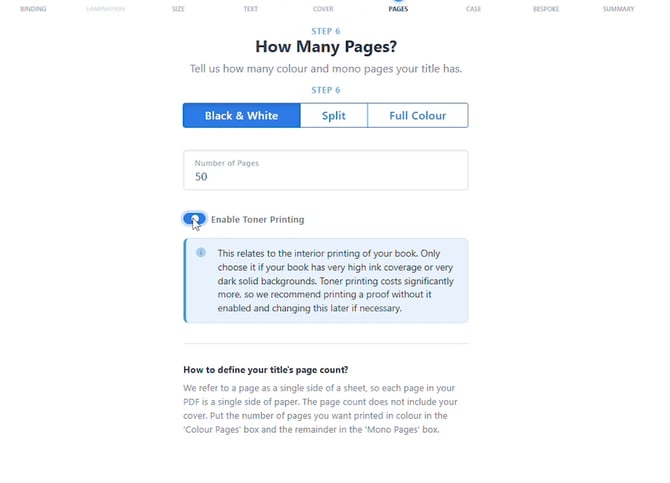
Enter the number of pages in your title, then choose whether they print in Black & White, Split, or Full Colour. If your book has very high ink coverage or solid dark backgrounds, you can enable Toner Printing — but this adds cost, so Bookvault recommends printing a proof first and enabling it later only if needed. This example prints 50 pages in Black & White with toner printing enabled.
Step 8: Choose Your Cased Options
This optional step appears for Case Bound titles.
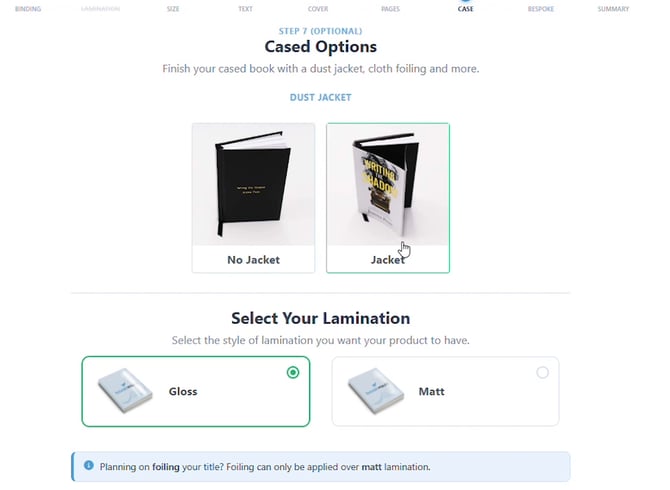
For Case Bound Cloth, you can choose whether to add a dust jacket or leave the cloth case uncovered.
If you want to add foil blocking to the cloth cover, continue to the foil-blocking options shown for the title.
Step 9: Add Cloth Foiling
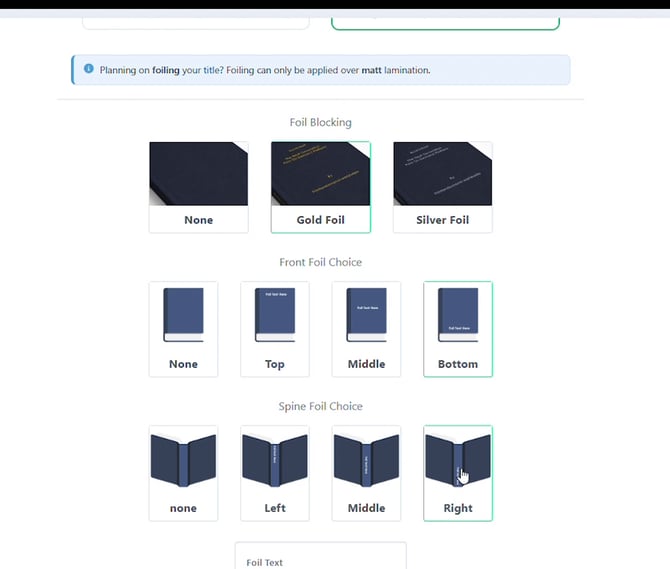
Case Bound Cloth supports traditional foil blocking on the cloth cover.
Choose the available foil colour, then select where the foil text should appear on the front cover and spine.
Enter the text you want foiled into the Foil Text field and check the preview before continuing.
Foil blocking on Case Bound Cloth is different from BookvaultBespoke advanced foiling used on printed covers.
Step 10: Explore Bespoke Finishes
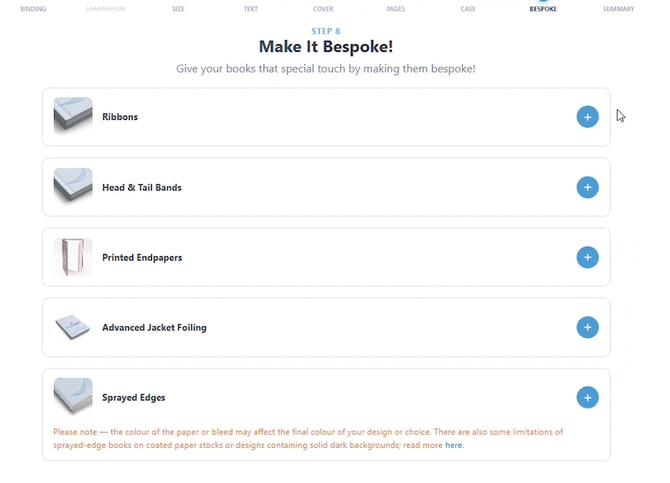
Case Bound Cloth titles unlock further bespoke touches beyond the cover foiling you just set: Ribbons, Head & Tail Bands, Printed Endpapers, Advanced Jacket Foiling (for the dust jacket itself), and Sprayed Edges. Click the + next to any option to add it and customise the details.
Step 11: Review Your Quote
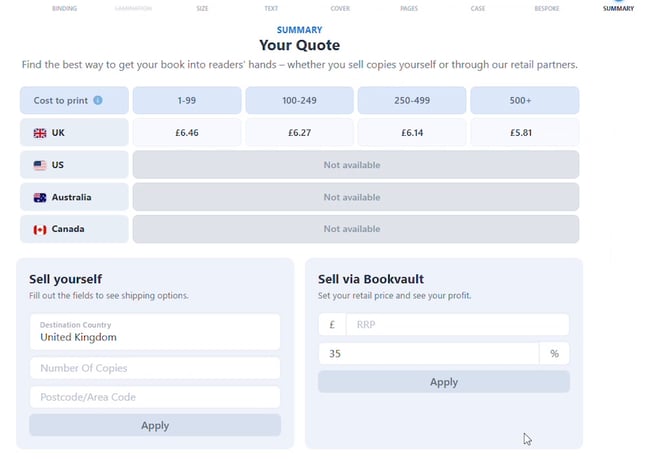
Your summary page shows the cost to print at different quantity tiers and by country, plus two ways to get your book to readers: "Sell yourself" (enter your destination and copy count to see shipping) or "Sell via Bookvault" (set your retail price to see your profit margin). Every option you selected is listed above the tables — click any of them to jump back and amend it before you complete your order.
Step 12: Download Your Sizing Templates
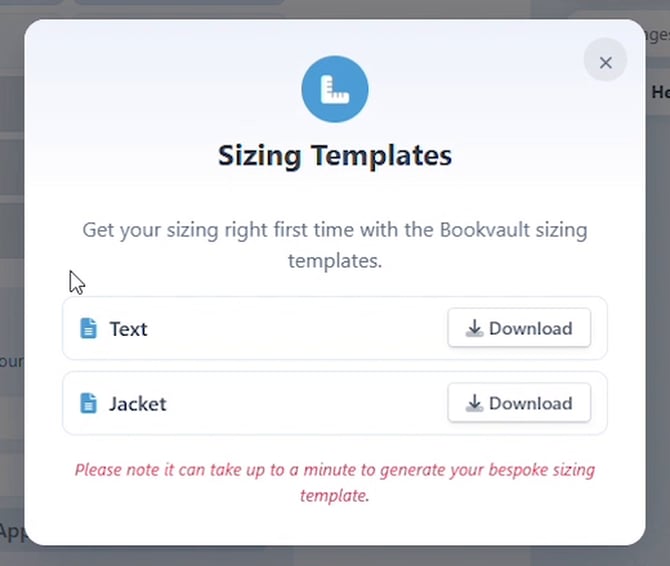
Before placing your order, download the Text and Jacket sizing templates from the "Download Sizing Templates" button. These help make sure your interior and jacket files are sized correctly the first time — note that bespoke templates can take up to a minute to generate.
Step 13: Claim Your First-Order Discount
New to Bookvault? A "Get 5% Off" prompt appears offering a discount on your first UK order — just enter your email to claim the code before you check out.
Frequently Asked Questions
Is Bookvault's instant quote tool free to use?
Yes. Building your title and getting an instant quote is free, with no account or payment required until you actually place an order.
Can I skip building step by step and just upload my file?
Yes. Choose "Upload my interior PDF" on the second screen and Bookvault will auto-fill your size, page count, and colour pages based on the file — you can still review and edit every field before finalizing your quote.
What's the difference between Case Bound - Cloth and Case Bound - PPC?
Case Bound - Cloth uses a genuine cloth hardcover in a range of colours, with jacket and foil blocking options, while Case Bound - PPC has a printed paper cover under an optional dust jacket. Both are hardcovers, but Cloth skips the printed-cover lamination step entirely.
Why doesn't this binding have a Lamination step?
Case Bound - Cloth uses a genuine cloth cover rather than a printed, laminated one, so the usual Gloss/Matt lamination choice doesn't apply. Instead, you choose a lamination for the foil blocking itself later, in the Cased Options step.
Why can't I add foil blocking?
Foil blocking can only be applied over a matt lamination. Choose Matt under Select Your Lamination in the Cased Options step to unlock the Foil Blocking colours and placement choices.
Is toner printing required?
No, it's optional and only recommended if your book has very high ink coverage or solid dark backgrounds. Since it adds cost, Bookvault suggests printing a proof without it first and enabling it later only if necessary.
Do I need to choose a dust jacket?
No, it's optional. The Cased Options step lets you pick No Jacket for a plain cloth-style case, or Jacket for a printed dust jacket over the cloth cover.
Can I change an option after I've moved on to a later step?
Yes. On the final quote summary page, click any of the selections listed above the tables to jump back to that step and amend it before completing your order.
How long do sizing templates take to generate?
Standard templates are typically instant, but bespoke templates — like ones for a jacket or foiling — can take up to a minute to generate.